
CHEVRE!

The classic french Chevre. Creamy, white, sweet, and luxurious. This is the quintessential goat cheese, and it is easy and thrifty to make on your own! I have been through 3 years of trial and error with this cheese and finally I feel confident to blog about my personal process with making this fabulous cheese.
This particular recipe is a 4 gallon batch which is fairly large so I will also provide the one gallon amts in [brakets]
Ingredients & Materials
4 gallons raw goat milk [1 gallon]
1 cup of cultured buttermilk (ideally organic) [1/4 cup]
1 1/2 drops of calf (sometimes labeled 'animal') rennett [2/5 of a drop]
*you might wonder how you can get a 1/2 of a drop or even 2/5 of a drop of something...well here is the trick...
get 1 cup of water, put one drop of rennet in that cup, stir it up. Then pour out 1/2. you are left with a 1/2 cup of water and a 1/2 a drop! Same concept with 2/5...you put 1 drop in 1 cup of water, stir up, then pour out 3/5 of a cup...leaving you 2/5 water and 2/5 of a drop.
Stainless Steel pot & lid
Stirring spoon
Thermometer
Cheese Muslin (not cheese "cloth" that you find in the grocery store, that is not fine enough for this cheese (or most cheeses really...) you can find cheese muslin at a brew store, online, or at joanne fabrics.
Large bowl
Scoop/ ladle for curds - I use a small pot with a handle.
Some rope
Step ONE.
First you need to sterilize your materials. I get the pot I am going to use and put in about a inch of water, along with all my tools (spoon, thermoneter, and scoop) that will touch the milk. I put the lid on the pot and let the water boil and steam everything for 2-5 mins. After I put my tools in a clean bowl on stand by.
Step TWO.
Pour in your milk!


Now you need to heat the milk up to 74 degrees. This is an ideal temperature for the buttermilk to culture the milk. As you heat the milk up, stir periodically to make sure it is heating evenly and not sticking to the bottom of the pot.

After you have reached temperature it is time to add in your buttermilk. Stir well.


Let the milk sit for one hour while it ripens.
Step SIX.
After an hour of ripening add in your rennet. You want to stir in a downward motion to incorporate the rennet properly. Rennet has a very low density, which makes it tend to float on the surface of the milk unless stirred downward. Do this for 15 seconds or so, then slow the milk down with your spoon. Now you want to put the cover back on and let it sit undisturbed in a warm place for 8-12 hours.

Step SEVEN.
After a long period of waiting...you get to check on your cheese. If it looks and feels like thick yogurt with a yellowy covering of whey, you have your chevre curd ready to hang.


This is a very good looking curd ;)
If the curd looks like this...floating on the surface...with tons of tiny holes in it...you have a contamination situation - most likely yeast. A good tip is to not make your cheese in that same room as you ferment wines, beers, or bake fresh breads.


This is not a good looking curd :(
Step EIGHT.
Now you can get yourself a big bowl - big enough to hold the same amount of liquid as the pot your using. Line it with your cheese muslin, and ladle out the curds into the cloth and bowl. Once all the curd is ladled out, you can bring up the ends and tie an over hand knot. You can easily rig up a cheese hanging system with a rope over a ceiling beam, but you can also just as easily hang it from a hook. Just make sure you hang it with enough space to drain out all the whey.


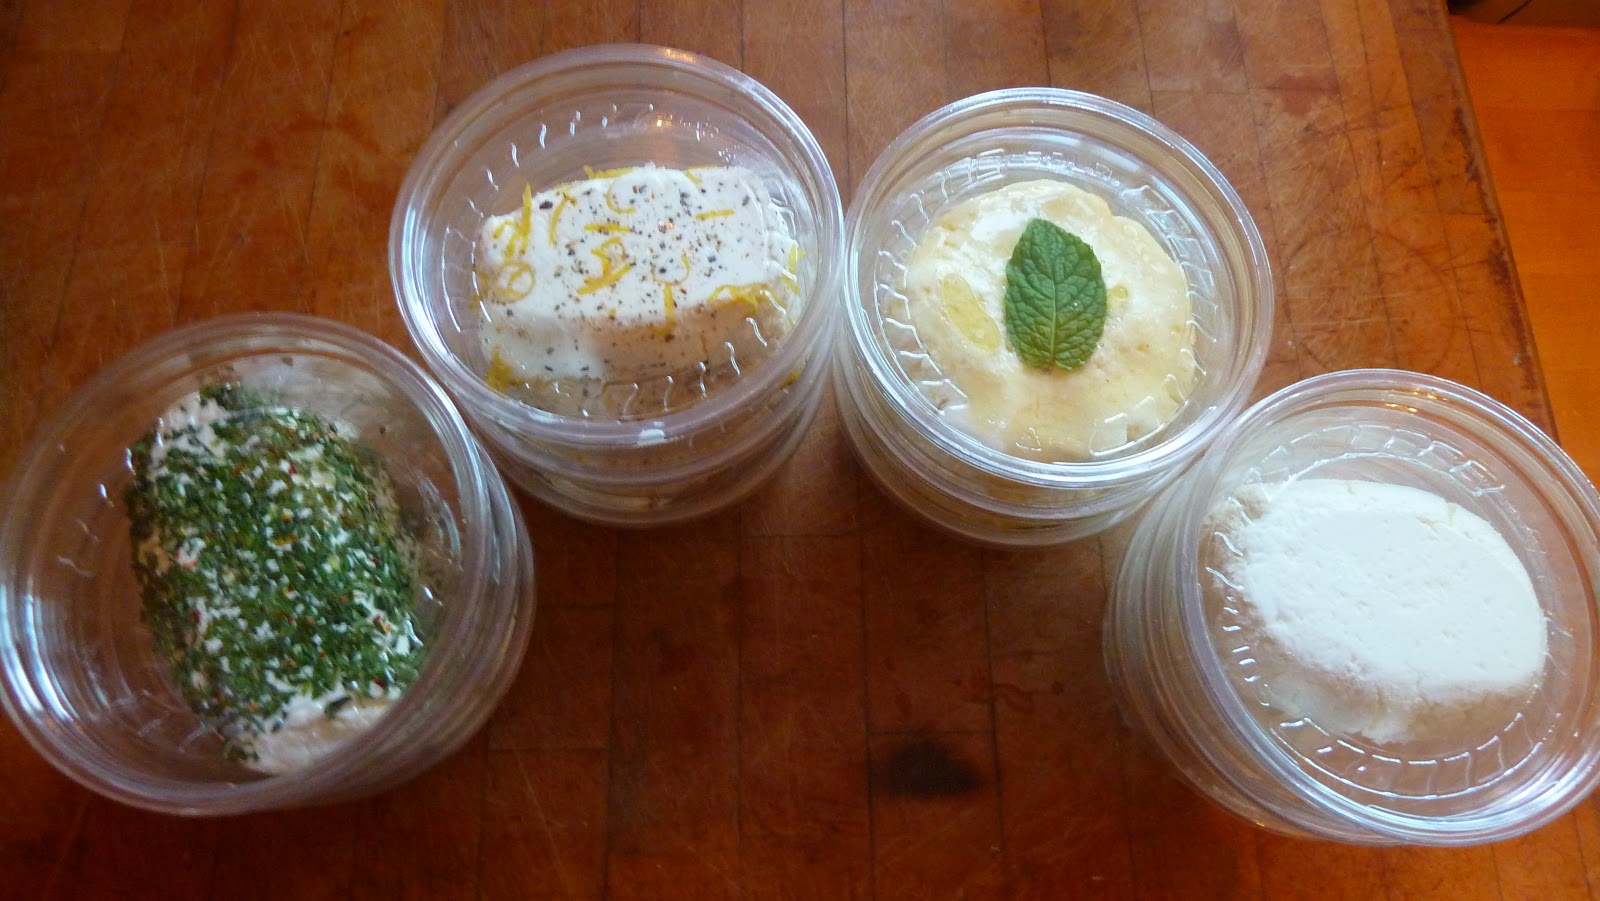
Let your curd drain for another 8-12 hours. When it is done draining it should be the consistency of a fluffy cream cheese. You can add all kinds of flavoring. Pictured below is from left to right - parsley and red pepper, lemon peel and black pepper, Honey and mint, and last but certainly not least the immaculate plain. You can store it in the fridge for weeks, and you can also freeze it for months. Abbondanza!